|
COOLING SYSTEM
|
|
|
The cooling system for this transplant is assembled mostly from a selection of OEM or aftermarket Honda parts. The radiator is one of those cheap types that you see all over eBay. The fan assembly is from a 5th generation Civic. The heater control valve can be found in just about any Honda or Acura from the 90s. Even two of the three thermostat housings used come from a 1st generation Civic. I actually first installed this radiator and electric fan while still driving the stock engine. It was a slightly tight fit, but I was pleased with the efficiency and quiet of the combo. The greater space created by the Miata engine, which sits farther back, allowed me to clean up my mounting system and create a pretty slick set-up. **PLEASE NOTE** In the stock Miata, water is *always* flowing through the heater. Thus, for the rear of the engine block to cool properly and for the fan to ever turn off after the engine has gotten to temperature, the shut off valve that I detail below CANNOT BE CLOSED. Since it is winter, I don't care. But, I do need to re-plumb the heater valve so that it bypasses into the return line when shut, rather than simply blocking the flow of water.
|
|
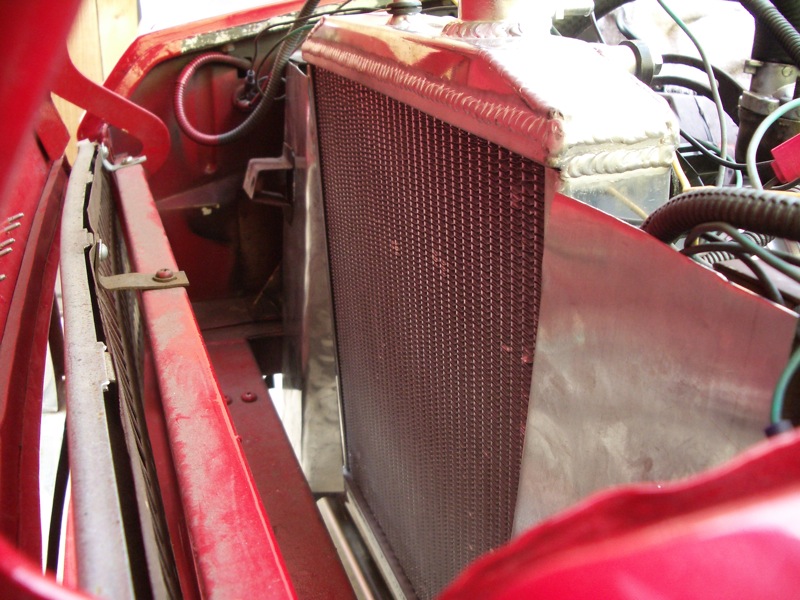 |
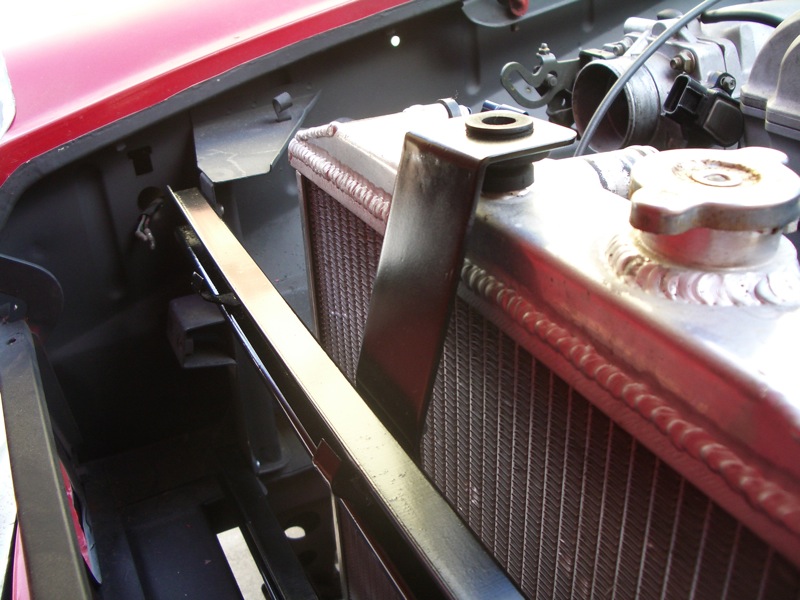
This shot shows the radiator and side deflectors installed with the stock Roadster engine. Note the angled cut of the far deflector. The radiator is tipped to keep the bottom away from the tie rod ends and the top away from the water pump nose. With the Miata engine, there is no need to tip the radiator -- plenty of room. |
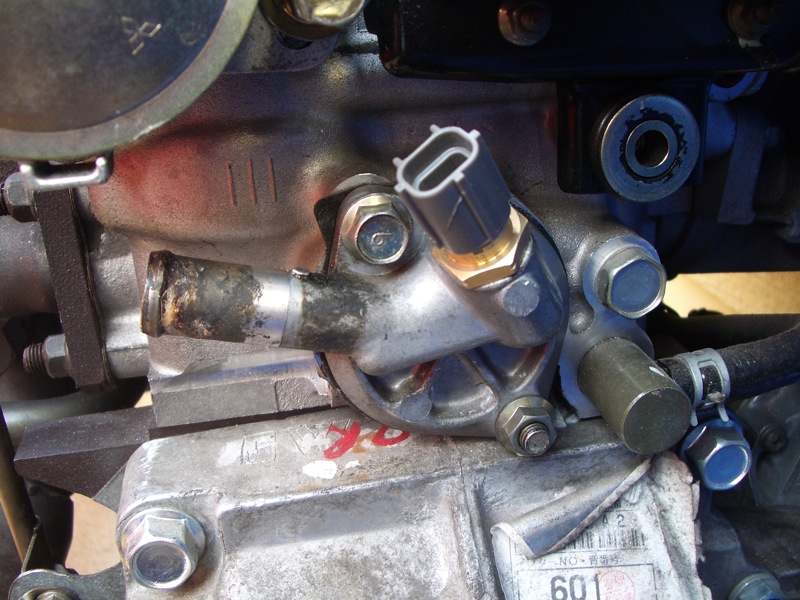 |
The stock Miata heater line inlet and outlet both jut out towards the driver's side completely parallel to the firewall. To mate with the Roadster heater, I cut the turn off the Miata return tube (not visible here, but shown a few steps below) and assembled an S-shaped hose for the inlet. |
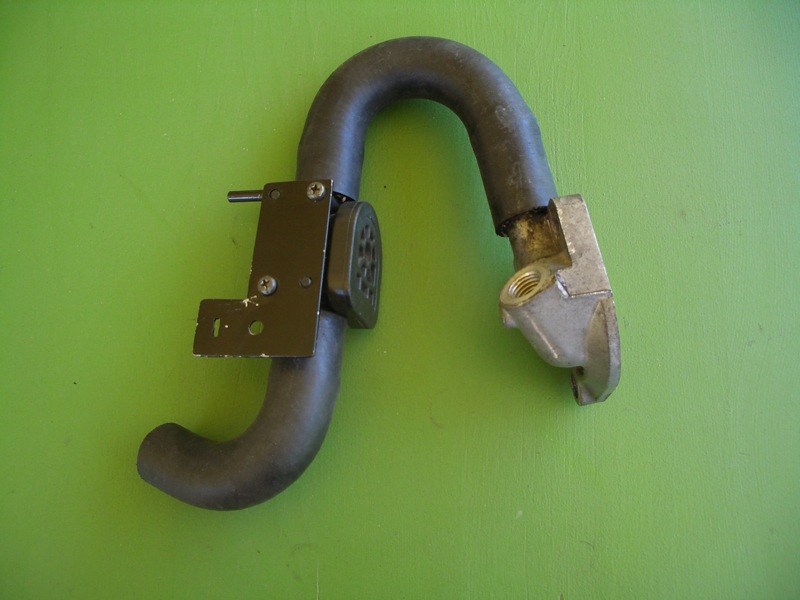 |
Here is is the S-hose created from the two ends of Goodyear hose #63039. These two bits of hose join the Miata hot water outlet at the back of the block to the Roadster heater inlet pipe, via a Honda heater valve. A custom mounting plate for the control cable is visible as well. |
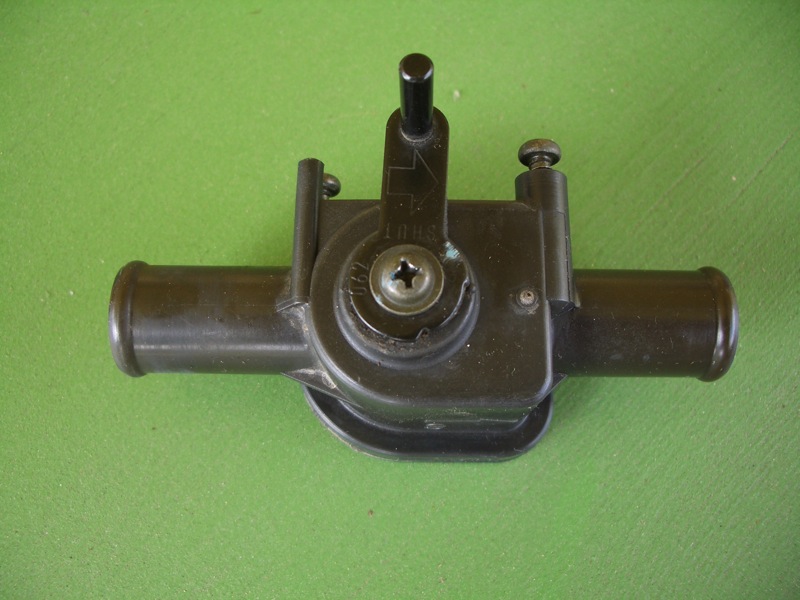 |
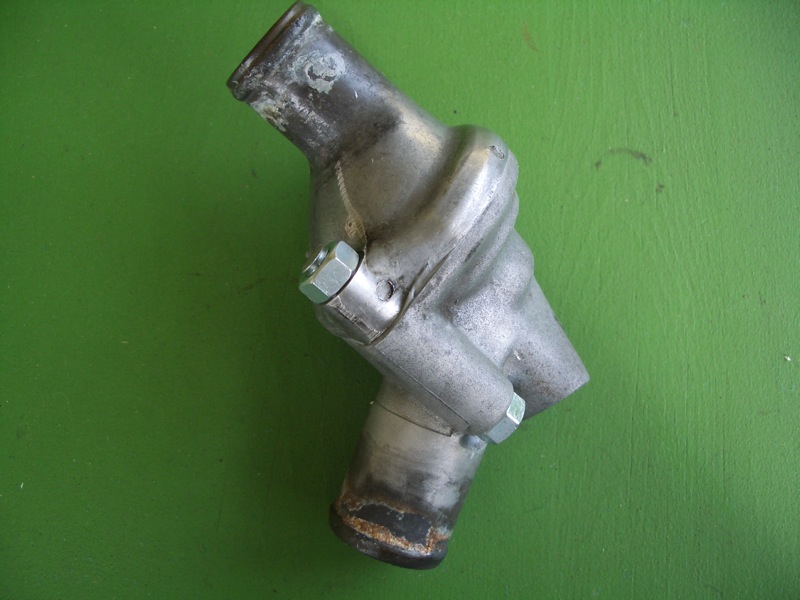
I'm using the heater valve from an Acura. Just about all Hondas and Acuras from the 90s seem to use this same small valve, with 11/16" fittings. On the Roadster, the cable pushes to open and pulls to close, so I will be installing this valve backwards relative to its stock flow orientation. I've also rotated the lever by 90 degrees. |
 |
I had to modify the valve slightly: I removed the lever and removed the nub that clocked it to a specific face of the square peg. Feel free not to cut as deeply as I clumsily did. I then re-mounted the lever turned 90 degrees from stock, as shown above. |
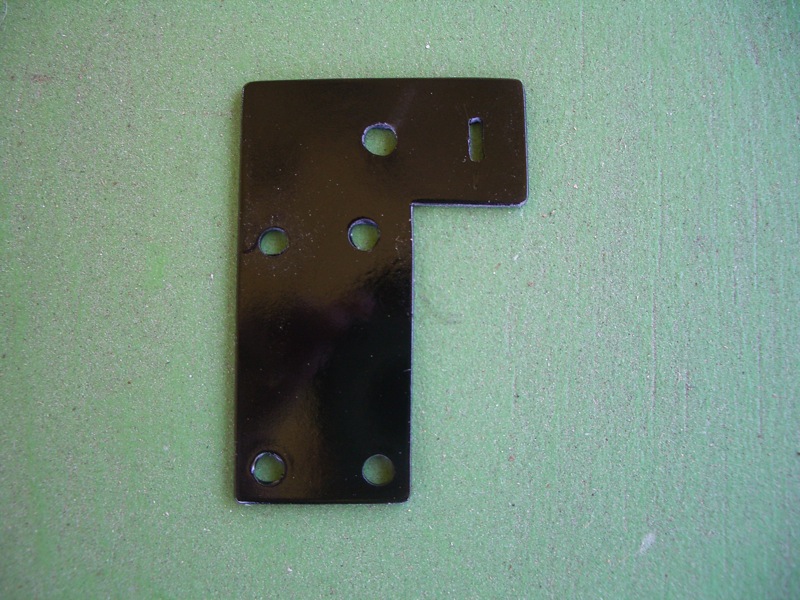 |
This plate mounts to the Honda heater valve and holds the control cable in place using a clamp I pulled off an MGB in the salvage yard. Or was it an Opel GT? Anyways, any old car will have a handy screw-down cable clamp.
|
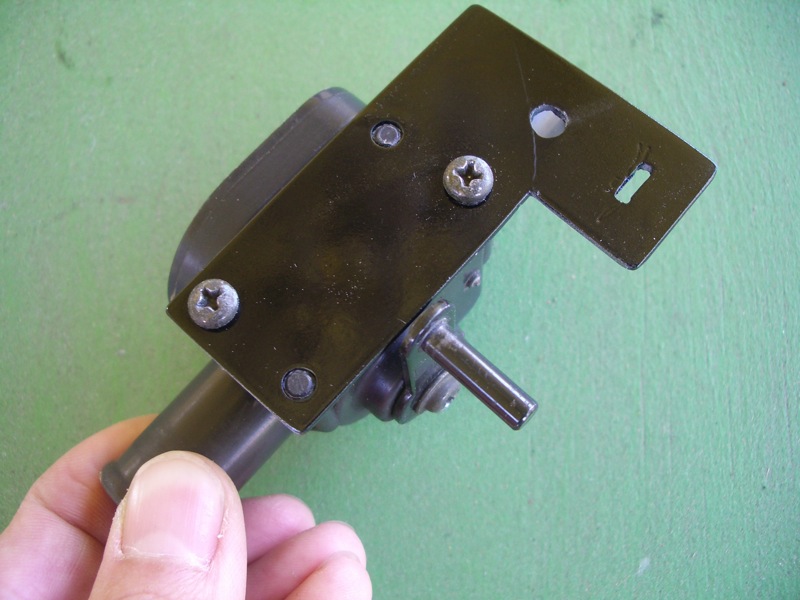 |
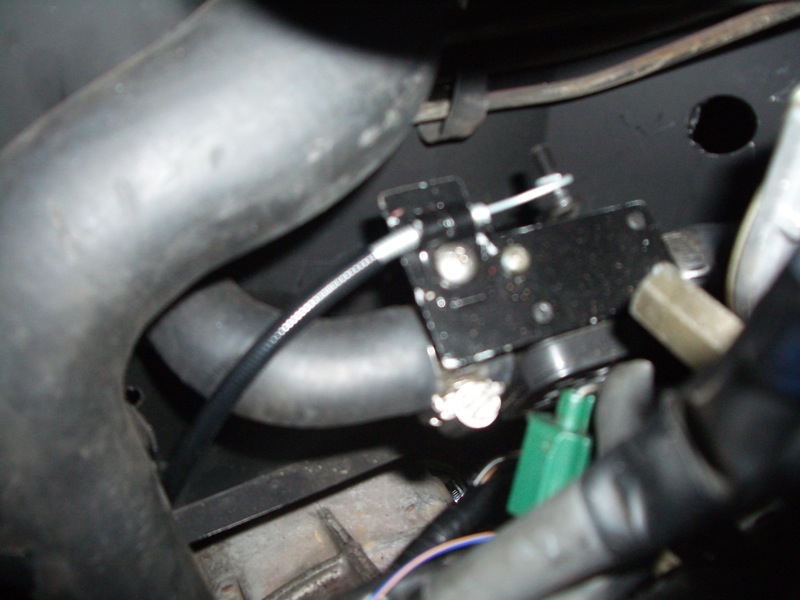
This is how the plate looks when mounted to the Honda heater valve. |
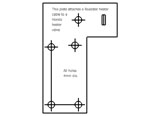 |
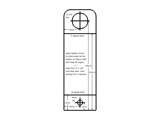
Here is a PDF template for the cable clamp plate. If your clamp differs, change the hole and slot at the top accordingly. You'll still find the template handy for locating the offset Honda valve locating pins and screw holes. |
 |
Here is how I cut down the Miata return tube, simply removing the bend (already gone in this photo) and the stock mounting bracket. I made a new bracket and attached it to the tube with JB weld. The tube is 11/16" but a 5/8" heater hose fits on it well enough. Tight is better than loose. |
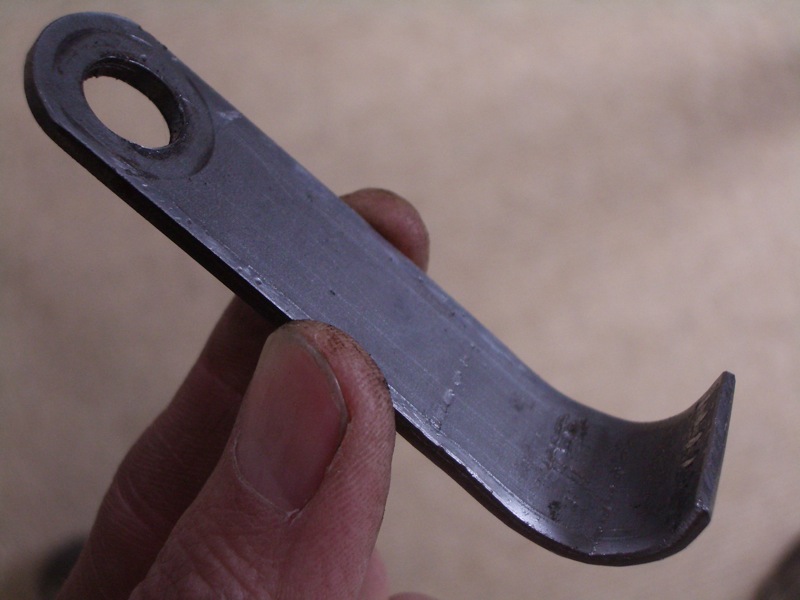 |
New bracket for the coolant return tube. Maybe this isn't the best way to do this -- I probably should have made one that clamped. But, this bracket mimics the stock solution, although I substitute JB weld for a real weld. |
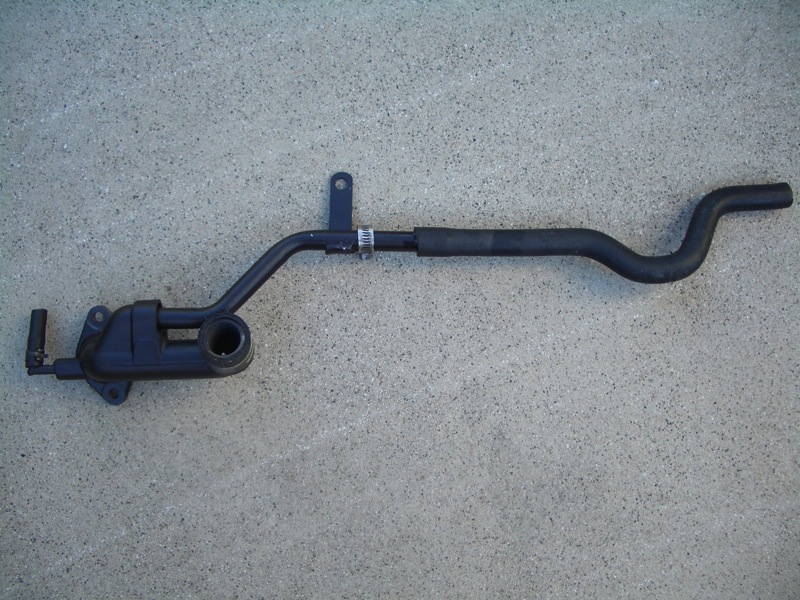 |
Modified coolant return tube completed. The hose is Goodyear #63049, cut down slightly on both ends. |
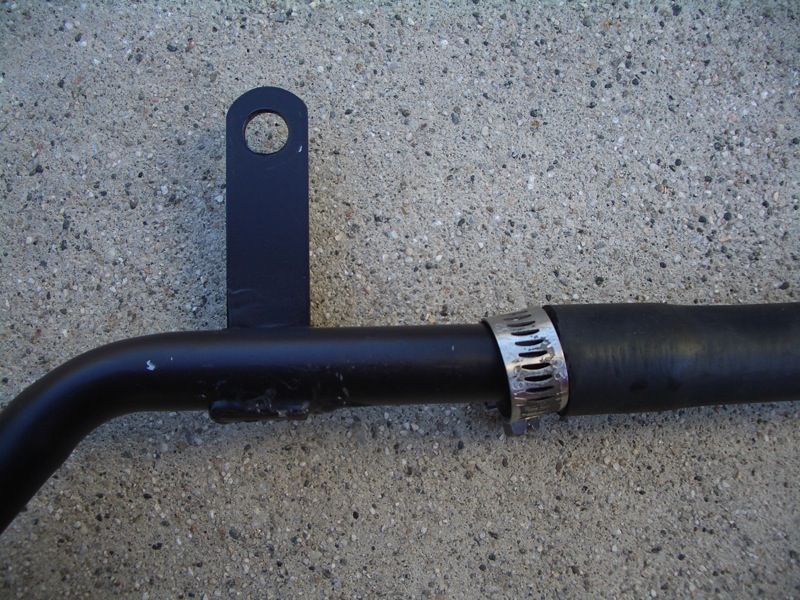 |
Here is a close-up of how the bracket mounts to the cut-down Miata coolant return tube. |
 |
I had to cut a hole in the backing plate for the new heater return hose to pass through. The hose doesn't acutally touch the edges, but I want to avoid chaffing. I'll keep an eye on it, and will edge the cut in some sort of rubber trim if there is any rubbing. |
 |
It's hard to see the heater lines all buttoned up, since there's so much going on in that space. I installed a new control cable (from Home Depot, for a lawn mower throttle) and ran it through the firewall in the stock position with a new grommet. No way I'd be able to attach it later. |
 |
The aftermarket Honda Del Sol radiator sits in two rubber bushings held by a pair of custom brackets. The brackets mount to existing threaded holes on the cross member; they are cut from 2" x 1/8" steel. The rubber bushings are from the upper radiator mounts of a late-model Daewoo. Plenty of these cars in one of my usual yards, for some reason.
|
 |
Here is a closeup of one of the lower radiator brackets. I used these same brackets to mount this radiator when I had the stock Roadster engine in place. The only difference is that I had to use much slimmer bushings (really just rubber grommets) and tip the radiator forward at the top to clear the Datsun water pump pulley.
|
 |
Here is a PDF template of my driver's side lower radiator bracket. Although I simply flipped this template over to create the passenger's side bracket, I did find that I had to tweak the bends slightly to account for differences between the two sides of the crossmember. Test fitment with pieces of cardboard or something before cutting the final pieces.
|
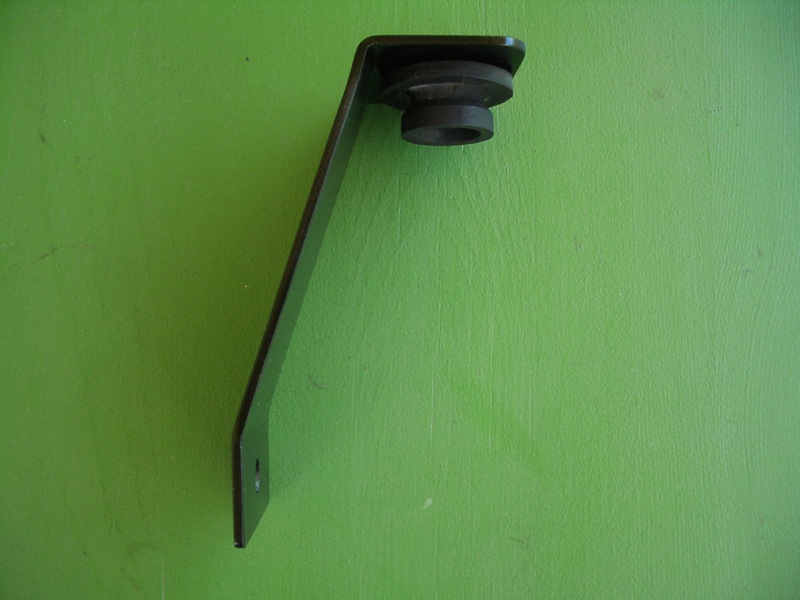 |
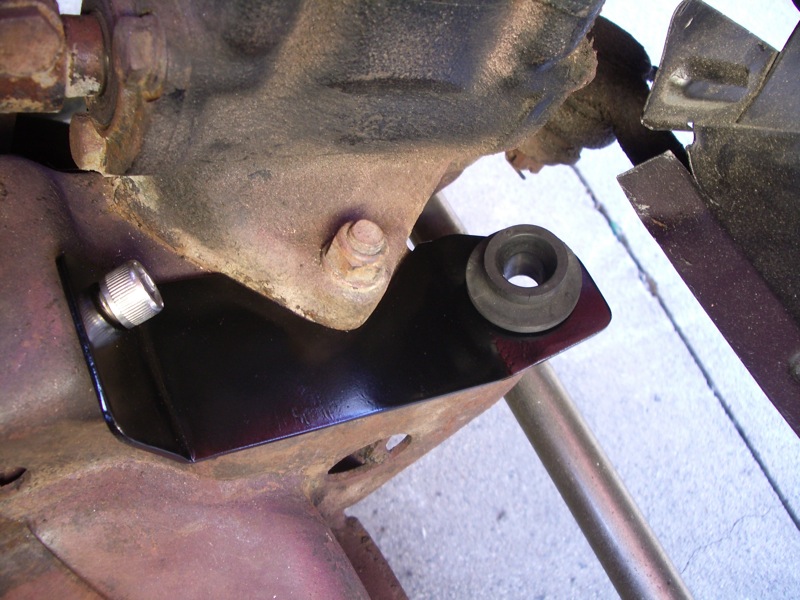
Here is the upper radiator mounting bracket, with a Daewoo bushing already installed. |
 |
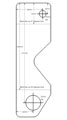
The template for the upper radiator mounting bracket. |
 |
The upper radiator bracket installed. This is not the most comprehensive view, but suffice it to say that the radiator fits very well and square, with a great deal of clearance all around and no cutting of anything (except hoses). It is well-placed relative to the stock air scoop below. I may yet make deflectors for the sides, though, as the Honda radiator does not fill the space. |
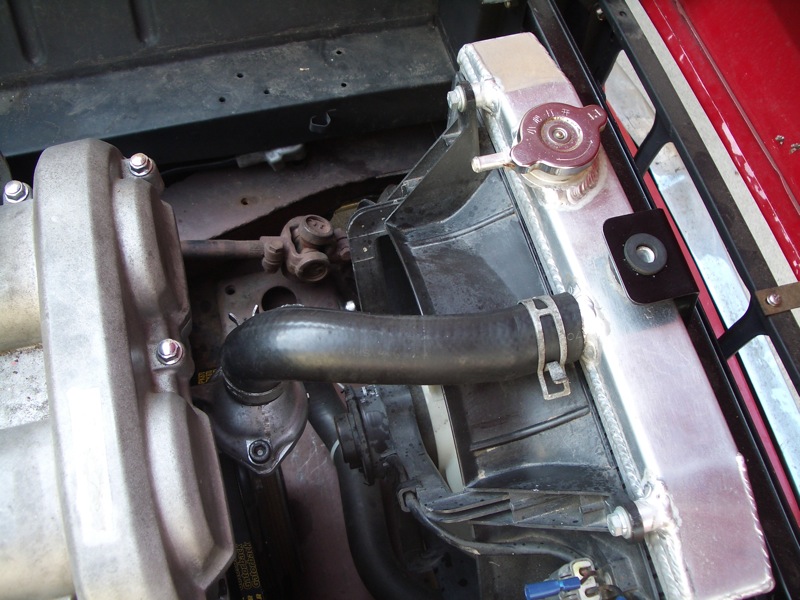 |
My engine came with a broken water outlet in the front. I replaced it with an early Miata (i.e. 1.6 liter) outlet, which opens up, not towards the left. To that I mounted a 1st generation Honda thermo housing. The Honda housing needed to have its mount holes bored out slightly. The hose is a portion of lower radiator hose from a 4th gen Honda. Perfect fit, including the jog to one side! |
 |
Down below, I had to create a reducer from the Miata's 31mm (ish) hose to the Honda's 28mm hose. Another 1st generation Honda thermo housing and the thermo housing from a Mazda 323 did the trick. Any front drive Mazda or Kia with the B6 or BP engine will have the same housing. |
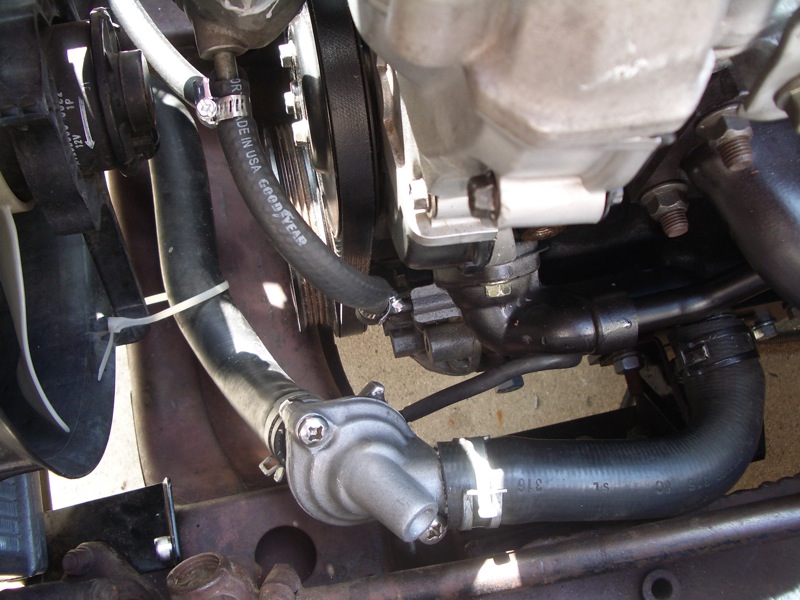 |
The front portion of the lower radiator hose comes from a 5th generation Honda (lower). The rear portion of the hose comes from '93 Protege. Both are cut to fit. The clearance with the frame is much better than it looks from above. |
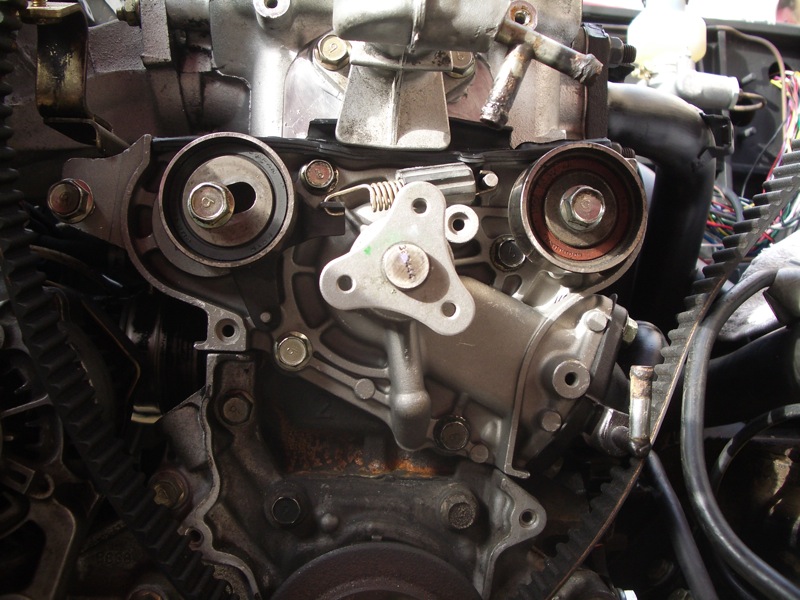 |
With the cooling system all buttoned up, I poured 4 quarts of distilled water in and waited for a leak. Boy did I get one: water *pouring* out of the pump housing. Seems the seals in these modern pumps die quickly without water, so the year the engine sat in my yard in Southern California pretty much killed them. Don't let this happen to you! Change your water pump and timing belt at the last possible moment before installation. |