|
THE ENGINE
|
|
|
The 1.8 liter BP block powered Miatas from 1994 through 2001. I've found that engine resellers generally consider the 1994-97 engines to be "the same". Likewise, the 1999 (there was no 1998) through 2001 are also lumped together. I don't know much about the latter group, except that they are much more complicated mechanically and electronically. Also, the head or at least the valve cover is supposed to be noticeably taller, so it might not fit under the hoods of certain classic sports cars. Besides which the earlier engines are much less expensive and are well-served by aftermarket goodies, which can often be had at lower prices themselves, now. It is important to note that these 1994-1997 engines are very much *not* the same. Most importantly, the 1994 cars and some, but not all, of the 1995 cars are OBD-I. The later 1995 cars, along with the 1996 and 1997 cars, are OBD-II. The 1996-97 cars change further with the addition of a crank sensor and some other sensor changes. Here is a good overview of the changes to the engine over its history. If you are like me, and buy your parts here and there from various cars as they come available, the lack of interchange can pose a real problem. At the very least, it makes the process take a lot more time. My engine arrived shortly after my birthday. Although I had ordered a 1996-97, I got a 1994. This peeved me, as I really wanted OBD-II. Also, the engine was from an automatic, and not a manual, so the compression is lower and I would have to buy a flywheel. Like most engine resellers the one I used insisted that all Miata BP long blocks are the same. Also, did I mentioned that the engine was damaged when it arrived? And I was up-charged $300 shipping? Don't order your engine from these people. The biggest problem with getting an earlier engine is that I had already bought an ECU and several harnesses for a 1996-97 car. Since 1.8 liter Miatas are not very frequently intact when they appear in the So-Cal salvage yards, it had taken me about 6 months to get these parts. Worse, I had passed by '94 ECUs along the way. Frustrating when you have little patience and less money, but after a few more months of looking and a couple bad eBay purchases, I got what I needed from the salvage division of Flyin' Miata. A great resource. I will say it here, and say it again in the Electrical section, you should really buy a whole Miata or a front clip or whatever it takes to provide yourself with an engine, transmission, harnesses and ECU that all fit together. It takes a whole lot more time, and more money, to pull together all the bits and pieces, and the variation among those bits and pieces is surprising and enough to make things not work. Nevertheless, here are two sources for rebuilt Miata engines that I came across: -"Precision Rebuilt Engines" has rebuilt 1.8L Miata engines, long block, for $1520. They are located in Houston, Texas. -"Best Rebuilt Engines" allows you to specify which 1.8L engine you are getting (e.g. the 3/95-11/97 with sensor on oil pump) from $2544
|
|
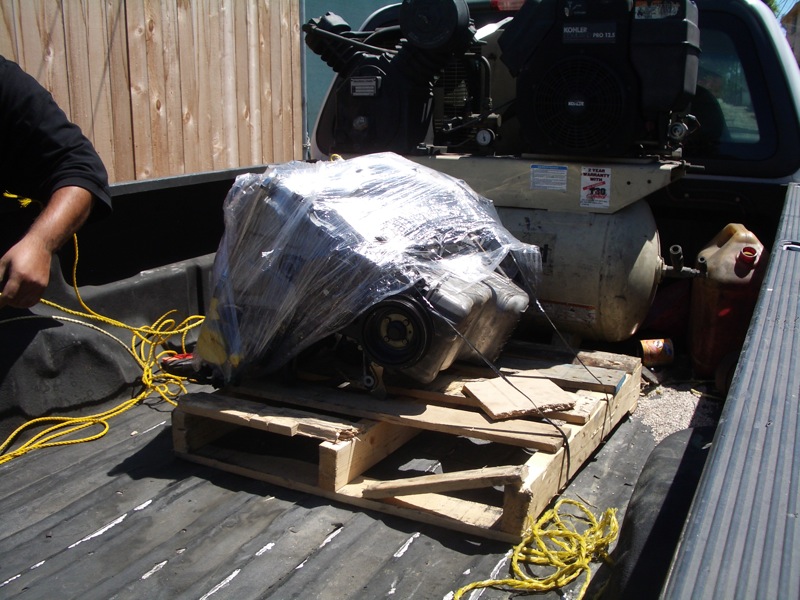 |
The engine arrived on this pickup and we hoisted it out with my 2-ton hoist and some 1000-pound rated climbing rope from an army surplus store. That rope is handy stuff. |
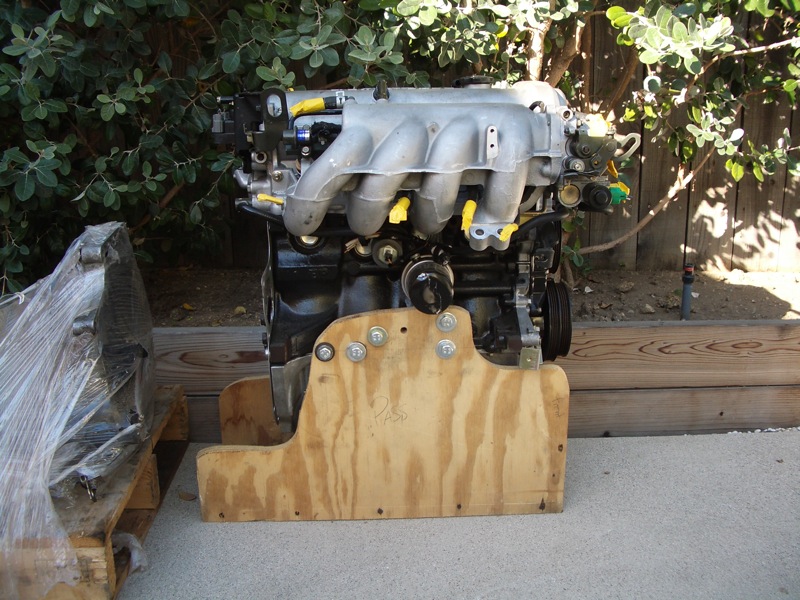 |
Quick and dirty stands cut from 3/4" plywood I had found in the alley behind my house in the morning before my engine arrived. Later I added 2x4s along the bottom edge because that thin tongue in the back had to take a lot of weight once I bolted the transmission on. Very solid stand, though, at a decent height, for working, for free. |
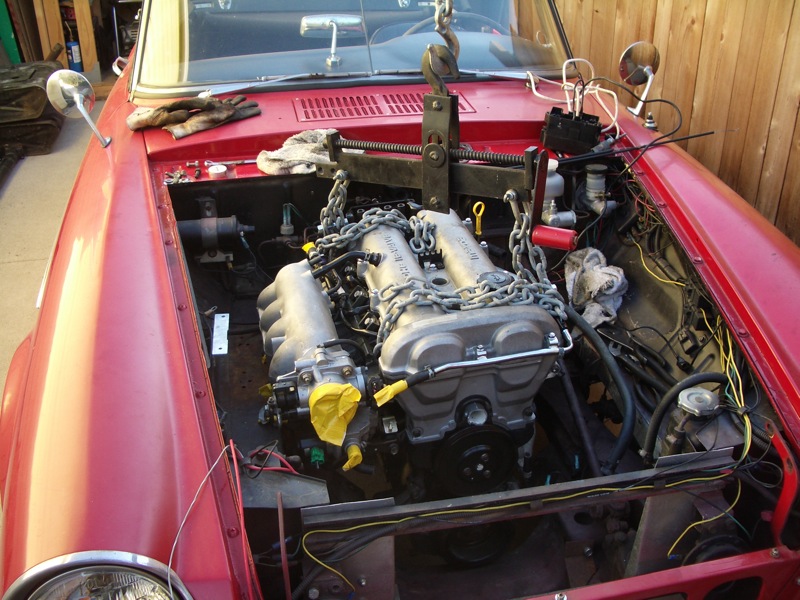 |
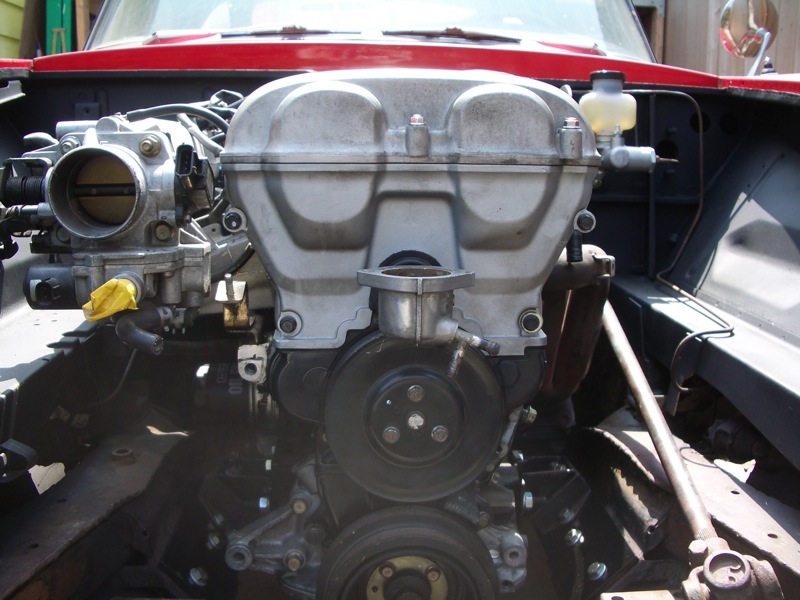
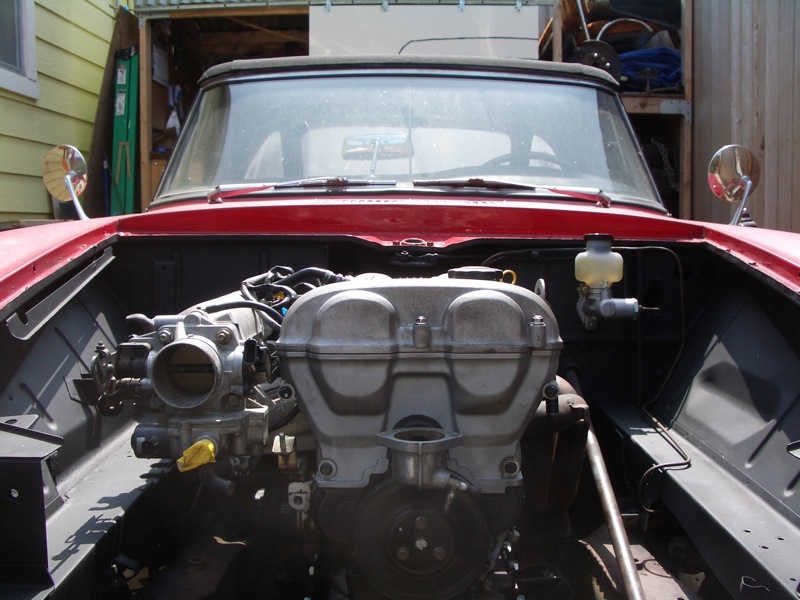
The test fit looks really good. But, this is just the engine. Everything changed once I bolted on the transmission and tried to center and level the drivetrain. Thus began the era of hacksawing bits and pieces off. It's most serious for the transmission, but what follows is what I cut off the engine. |
 |
In the end, this was the only "necessary" cut off of the engine, and even it is specific to my particular plan for mounting the engine. It is a small nubbin of iron that sticks off of the lower mounting point for the alternator. |
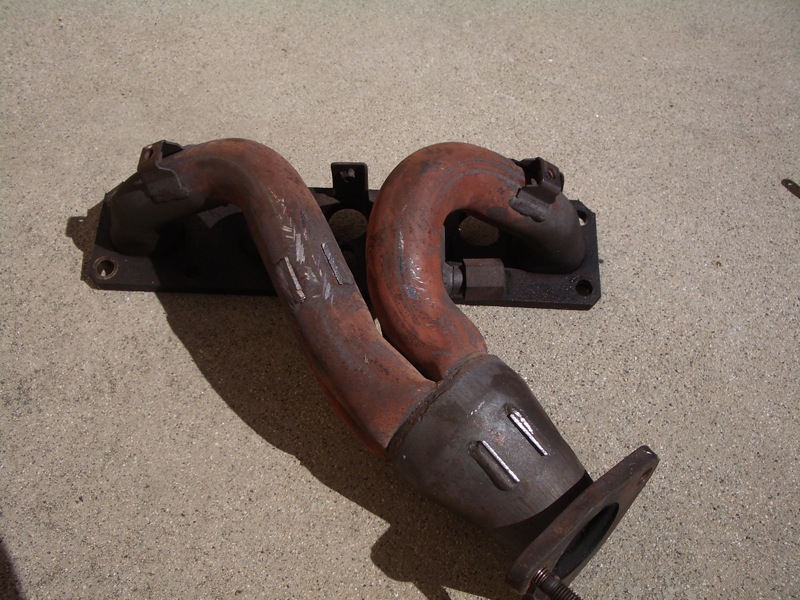 |
I also cut some of the tabs for the heat shielding off of the exhaust manifold to clear the steering column and frame rail. At some point, I'm going to replace this ratty thing with a nice aftermarket manifold. But, for now my money is going elsewhere. |
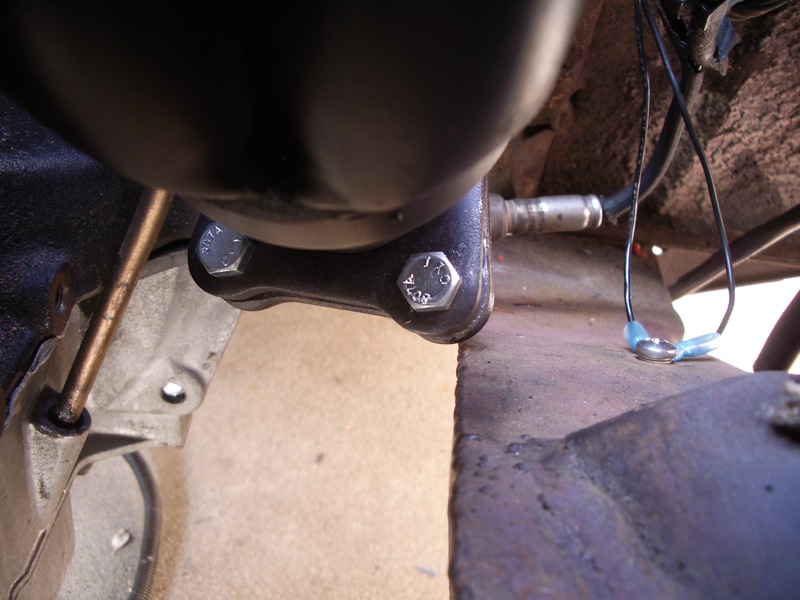 |
Not a great deal of clearance here! I guess I'm going to have to buy an angle grinder (finally an excuse) and grind the manifold for something more like a 1/4" gap. |
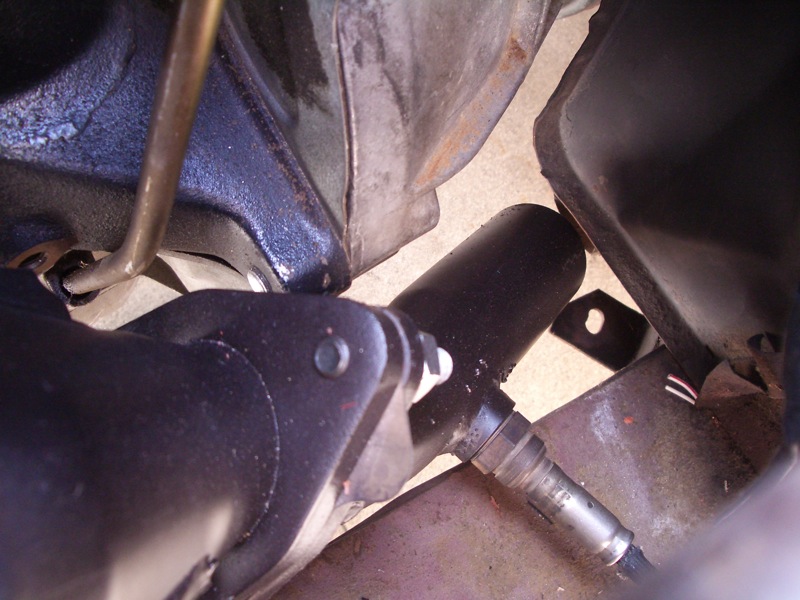 |
A short portion of the stock Miata downpipe holds the O2 sensor. Before I take the car to the exhaust shop, I'll cut this a little shorter and they should be able to form a nice curve under the footwell and right into the cut-off end of my 2-1/4" exhaust system that I was using with the stock 1600 engine. |
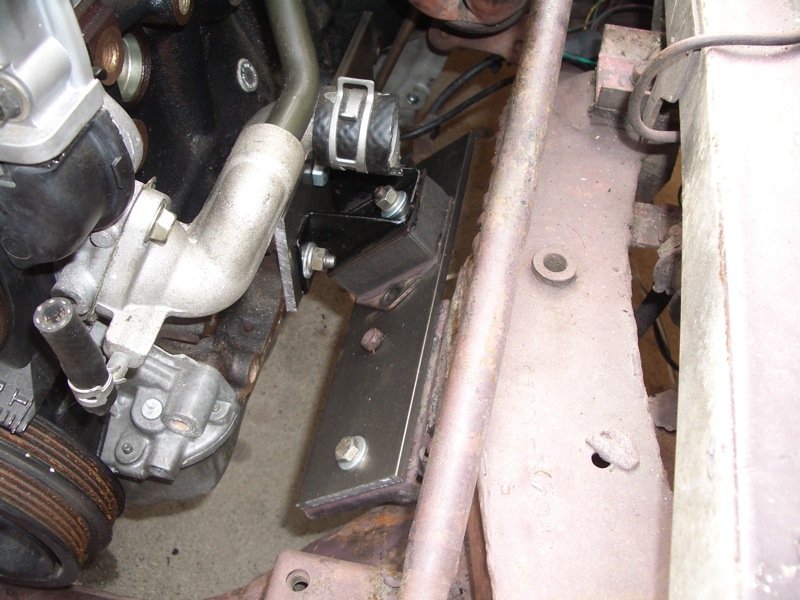 |
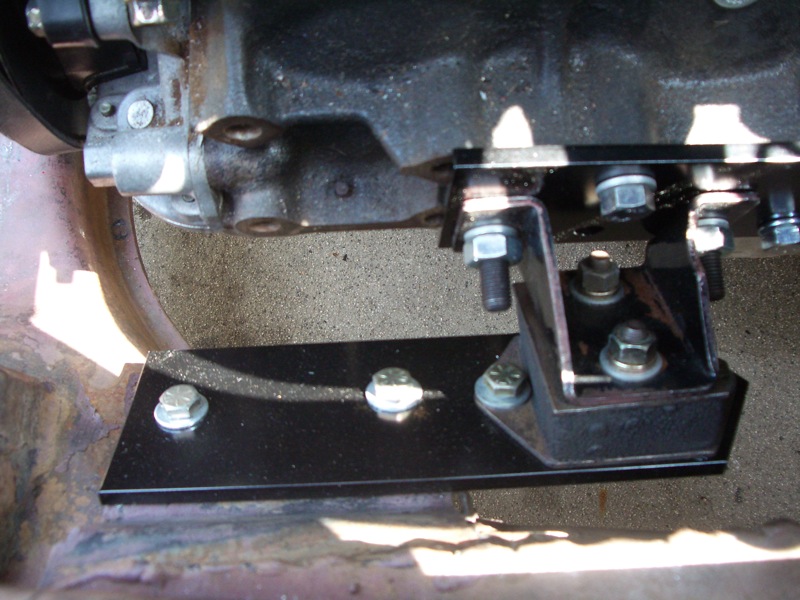
Here is a test fit of my mount solution, on the driver's side. It uses two 1/4" x 3" steel plates to join the stock Roadster mount to the stock BP mounting holes and the stock Roadster frame pad. The cantilevered plate deflects about 1mm under the engine's weight. We'll see what it does under the torque of a running engine. |
 |
Same deal, on the passenger side. I really like this solution because it self-centers the engine and requires so little in the way of fabrication. We'll see how it holds up. I will probably end up welding new pads to the frame at some point, if I love the new engine. I like that, for now, this is completely reversible. |
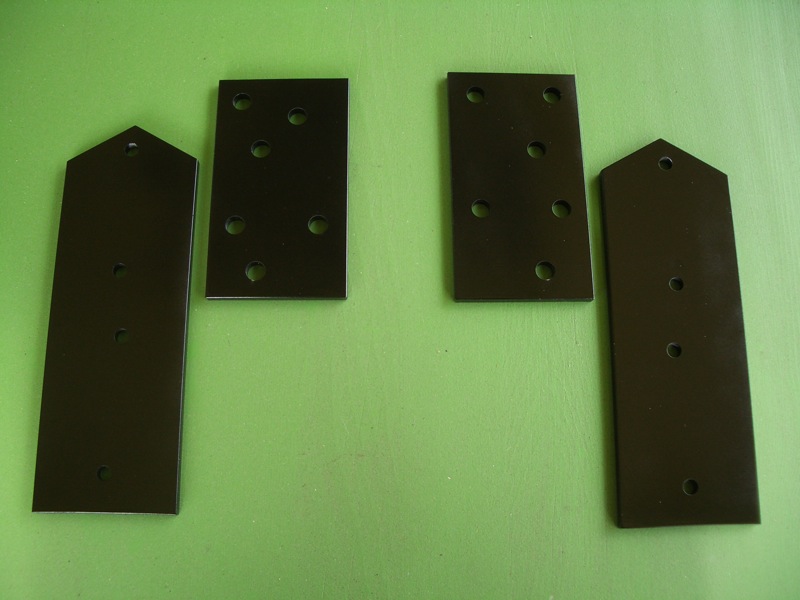 |
Here are the four plates necessary to mount the Miata 1.8L engine to the Roadster frame, using the stock mounting points on both. They put the motor at a height that (a) is nearly as low as possible while still allowing the oil filter to be (relatively) easy to remove and (b) puts the drivetrain level with the transmission output shaft at the stock height. |
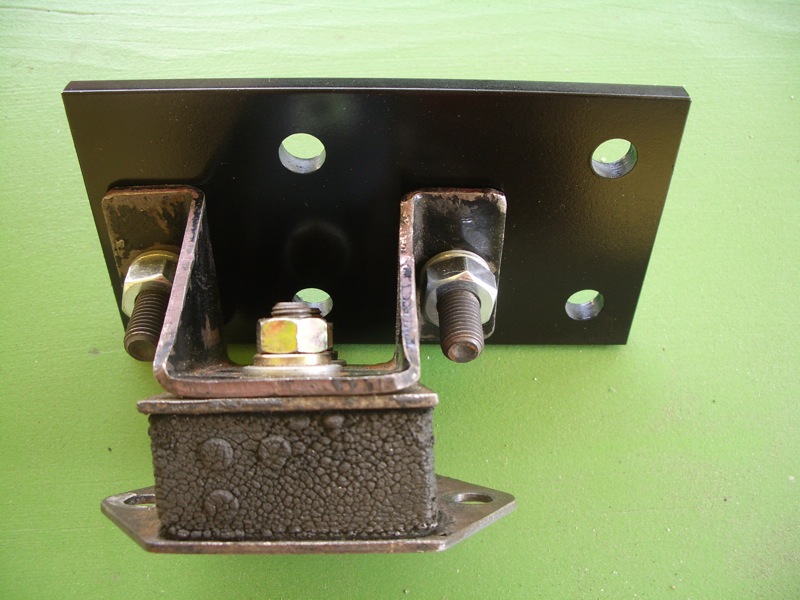 |
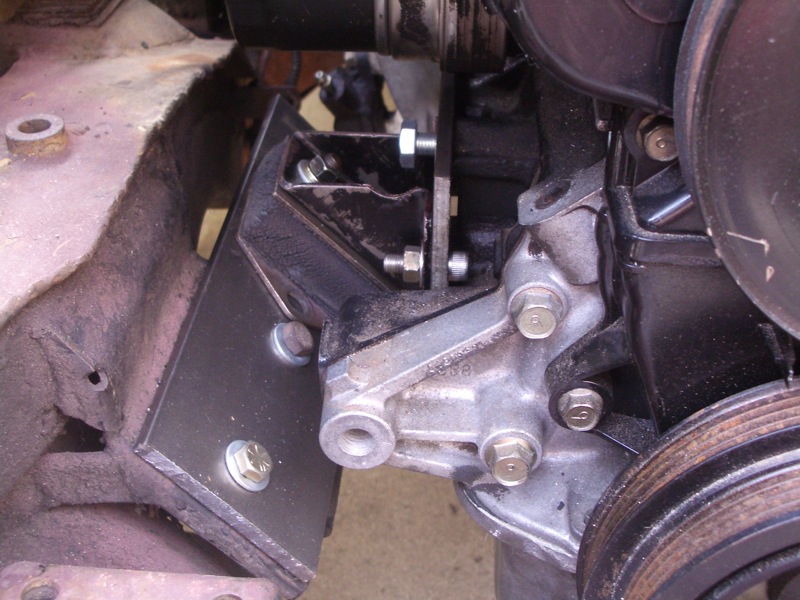
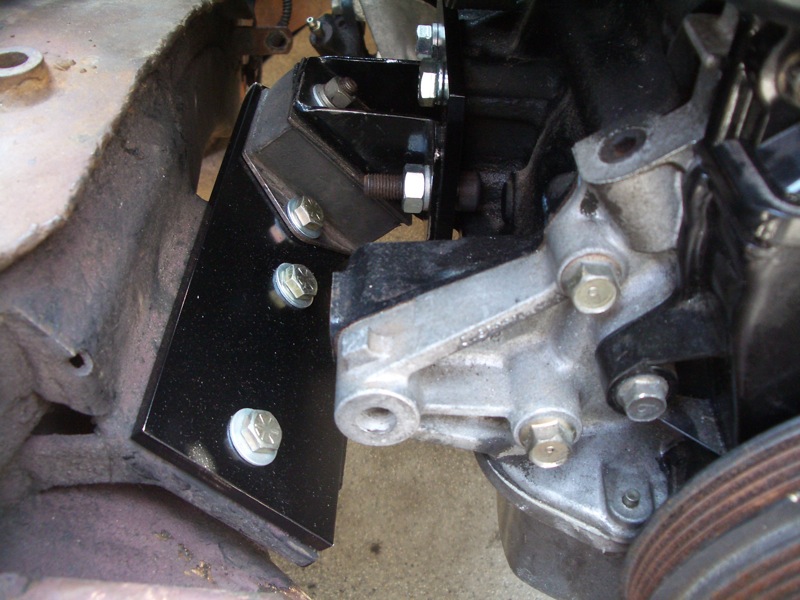
Here is a detail shot of the driver's side plate, with the Roadster mount attached. All the bolts for mounting to the block are 10mm, but the lengths vary as the depths of the mounting holes are curiously irregular. |
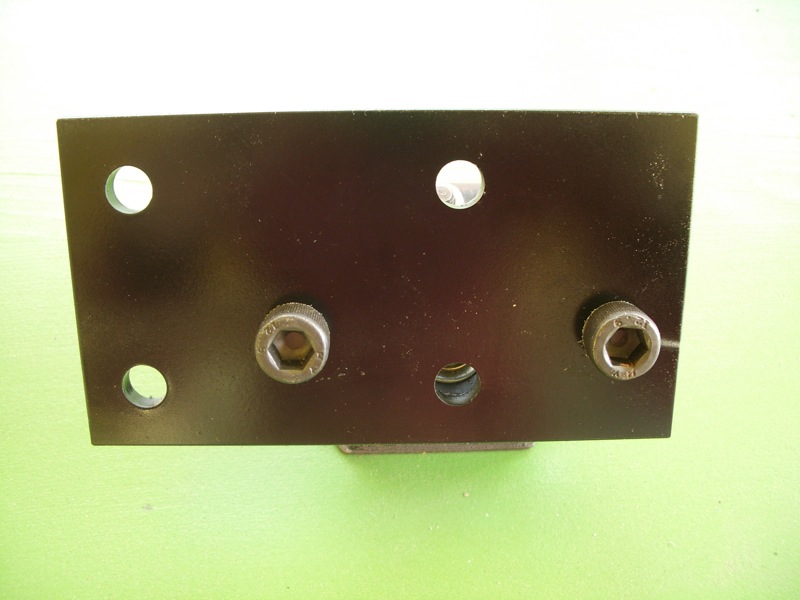 |
To ensure clearance of the ribs in the block's casting, I had to use allen-head bolts to attach the mounts to the plates. The mounting points on the driver's side of the BP block form a nice rectangle. But, on the passenger's side, they form a wonky trapedzoid. Also, they are set back 10mm on the passenger's side, relative to the driver's side. |
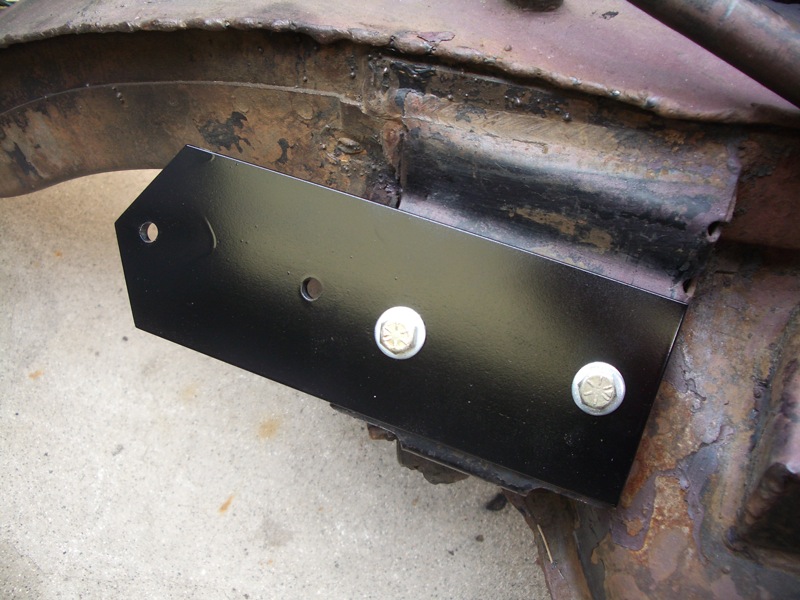 |
Here is a shot of the driver's side frame pad extension in place. I bet most of the paint will be scraped off before the motor is bolted down. I would suggest powder coating all of these plates, but it was easier just to rattle-can them. These two are held in place with two 5/16" grade 8 bolts each. They should be able to take the forces of the slight cantilever. |
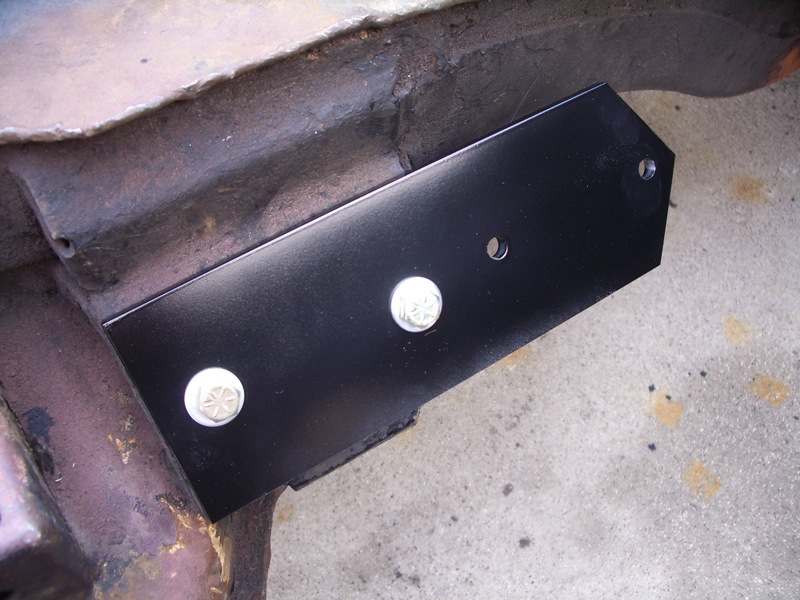 |
Two fine-thread, grade-8 5/16" bolts hold each pad plate in place. I backed the threaded front hole on each frame pad with a grade 8 nut and lock washer for good measure. In theory, each of these bolts should be able to take over 8,000 lbs. of tension before the heads pop off. I still don't love the cantilever, but I'm a sucker for ease and simplicity. |
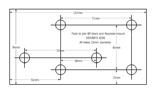 |
Here is the PDF template for the plate that allows you to bolt the stock Roadster engine mount to the driver's side of the 1.8L Mazda BP engine. It is cut from 3" x 1/4" cold-rolled steel. |
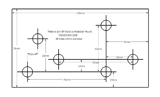 |
Here is the PDF template for the plate that allows you to bolt the stock Roadster engine mount to the passenger's side of the 1.8L Mazda BP engine. It is cut from 3" x 1/4" cold-rolled steel. |
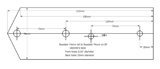 |
Here is the PDF template for the plate that allows you to bolt the Roadster mount attached to the Mazda 1.8L BP block to the stock driver's side pad on the Roadster frame. It is cut from 3" x 1/4" cold-rolled steel. |
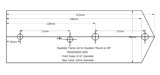 |
Here is the PDF template for the plate that allows you to bolt the Roadster mount attached to the Mazda 1.8L BP block to the stock passenger's side pad on the Roadster frame. It is cut from 3" x 1/4" cold-rolled steel. |
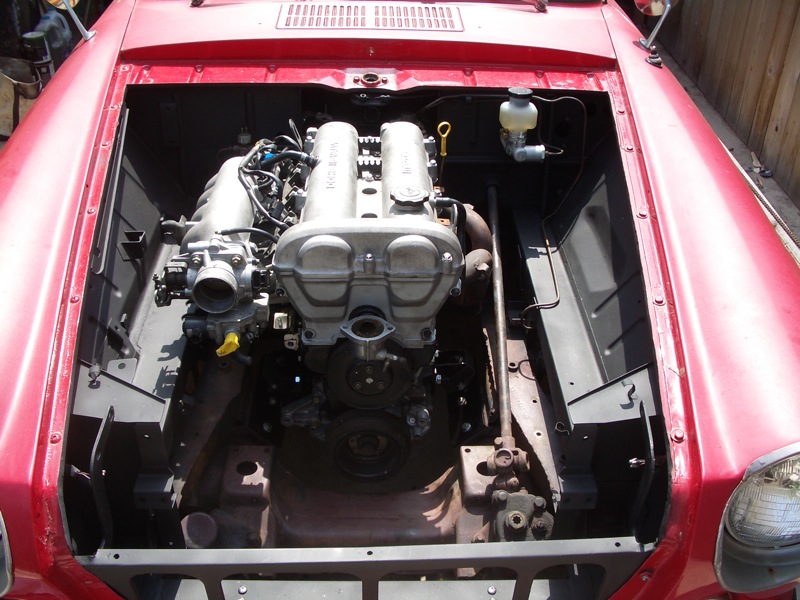 |
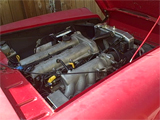
Over-all shot of the engine finally bolted-in, hopefully for the last time, in the re-painted engine bay. |
 |
From the front here, you can see the mounts in the lower left and right corners. |
 |
This view gives you a sense of how low the engine sits. I couldn't put it any lower without the oil filter being blocked from removal by the frame rail. |
 |
The final installation of the driver's side plates and mount. Sorry for the bad focus. |
 |
The final installation of the passenger's side plates and mount. |
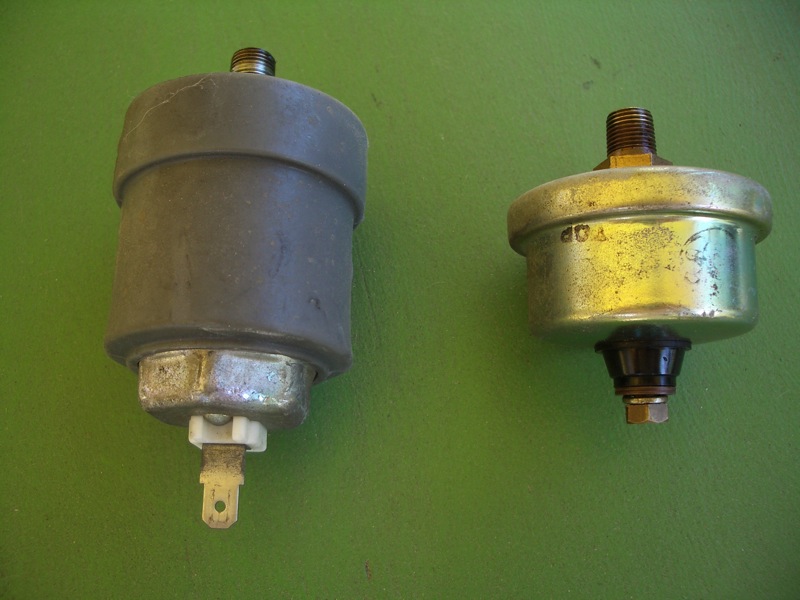 |
The stock Roadster oil pressure sender (right) supposedly has the same thread (1/8" BSPT) as the stock Miata oil pressure sender. As I screwed the Miata sender in, I'm convinced the threads were crossing, but it's firmly in there and does not seem to leak, so I'm not touching it. |
 |
First generation MR2s have air tubes that are 65mm on one end (like the Miata manifold) and 70mm on the other (like the Miata MAF. They don't have a connection for the idle air tube, but I drilled a hole in the tube and attached a short piece of line so that the idle intake was breathing air the MAF had measured. |
 |
IT STARTS!! It cuts off at idle, but I suspect that is because my temporary air intake tube leaves the idle air intake out of the circuit. We'll see once I've modified the tube. I have 40 lbs. of oil pressure near idle. I haven't gotten the water temperature above 140F. |
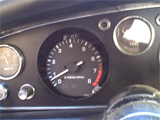 |
I've jury-rigged the Miata tachometer into the Datsun. The engine idles pretty smoothly at 750 RPM, now. The air intake, with no filter, is really loud, as the video to the left demonstrates. The temperature holds steady at 180F. The thermostat and cooling fan are working. |
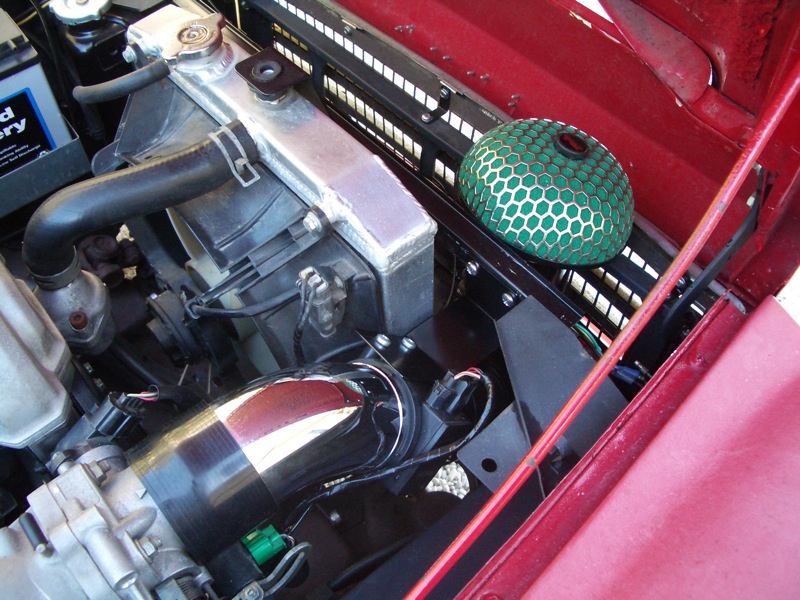 |
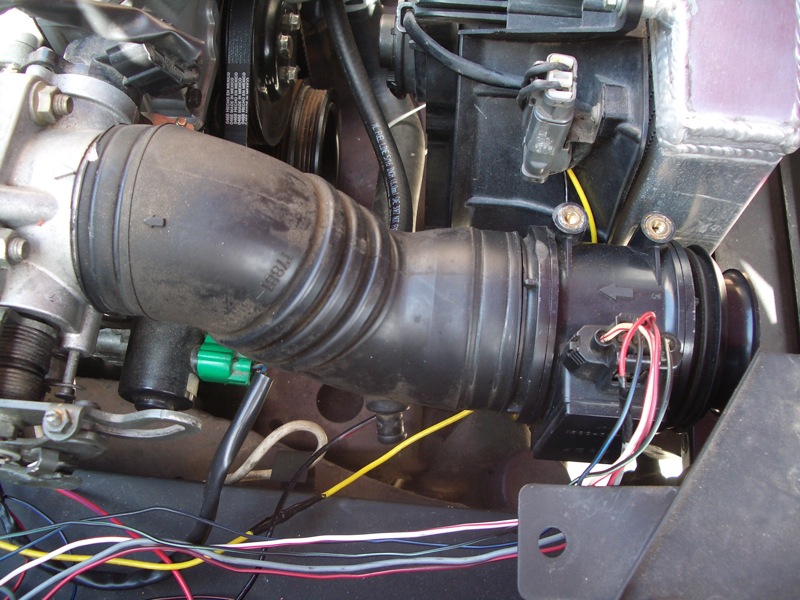
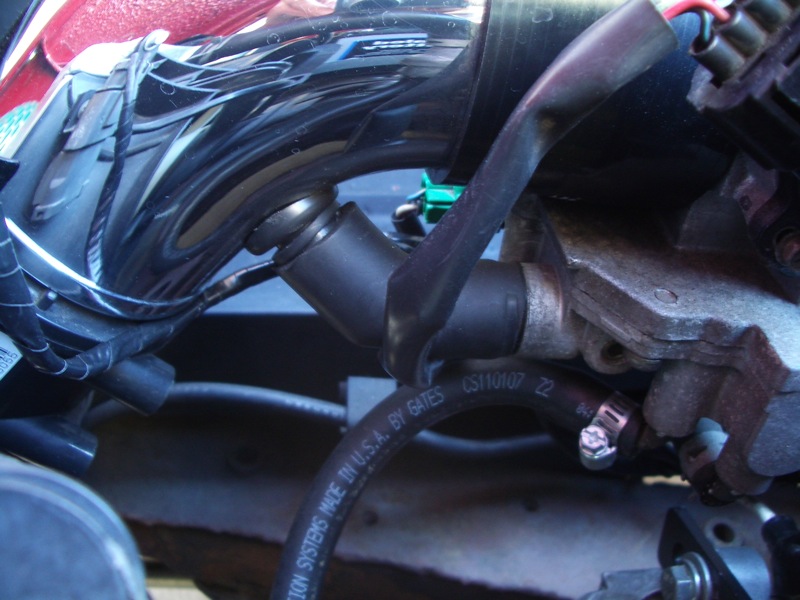
The air intake setup I'm using consists, from the manifold outwards, of a 3" to 2.5" reducer, a 45-degree, 3" diameter elbow, the MAF, some 3" acordion intake tube, and a knock-off HKS "mushroom" air filter. The components were inexpensive, the fit is clean and I get cold air in with little change of water entering the system. |
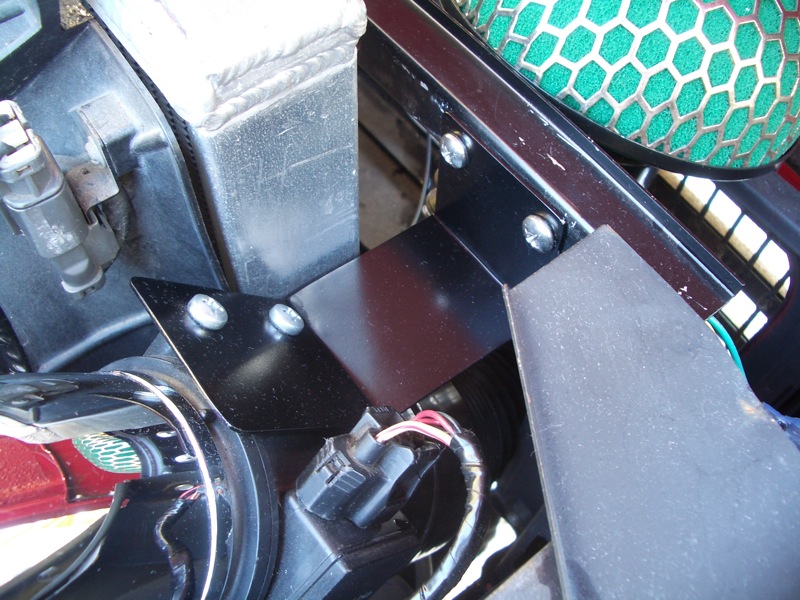 |
This bracket holds the MAF in place. Since it slips directly into the hard elbow, there was no way to clamp the MAF to the tubing. Even though the MAF is hard mounted to the body, there seems to be enough flex in the rubber sleeve at the throttle body that engine movement does not cause a problem. |
 |
I crafted an idle bypass from a random 18mm elbow of hose and a nipple kit by the same people who made the other intake tubing.
|
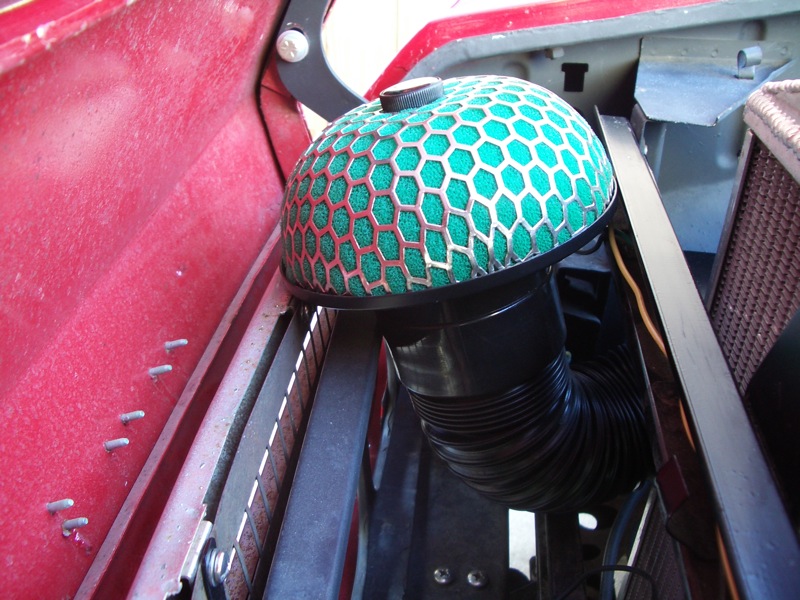 |
I used the acordian tubing to reach the air filter because the narrow spaces between the 3" rings fit in the 2-3/4" gap between the radiator and the side panel. If I hadn't set the goal to avoid modifying the vehicle, I would have clearanced the side panel and used hard tubing of some sort through here. The filter just barely fits under the hood here.
|
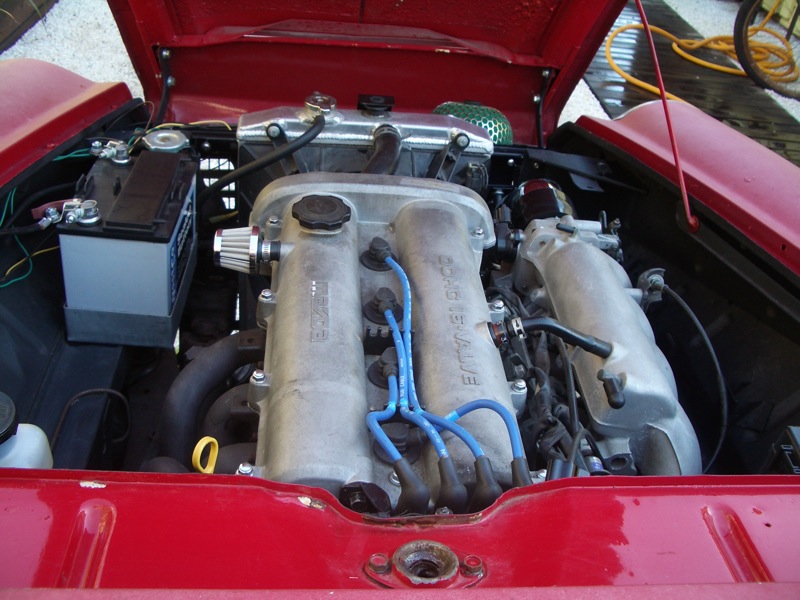 |
An overview of the completed engine bay. |